1 Using Slideshow in Rhombus
The main function provided by the slideshow library is slide:
When the slide function is given a static pict, it registers a single slide with the pict. If a title is given as a ~title argument to slide, the title is added to the top of the pict. Whether or not a title is provided, the pict is combined with a blank pict that represents the slide client area, and it is positioned based on a ~layout argument that defaults to centering the pict (unless it’s too tall, in which case the pict is top-aligned to the client area of the screen).
When the slide function is given an animated pict, it registers a slide for each epoch in the pict’s duration. For each epoch with a non-0 extent, additional auto-advancing slides are registered to render a transition between stopping slides. Arguments for ~title and ~layout are used to compose each registered slide, the same as for a static-pict slide.
Thus, a presentation can be generated by calling slide many
times to register a sequence of static picts, calling slide
once with an animated pict that implements many slides at once,
or—
1.1 Multiple versus Single slide Calls
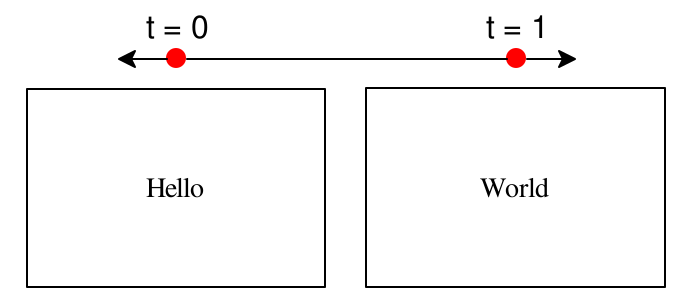
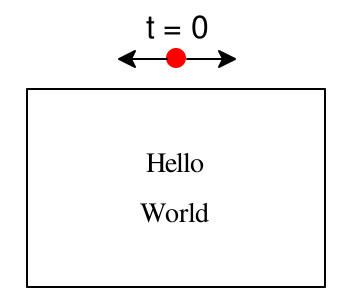
For example, this talk
and this talk
@t{World}))
produce the same result, which is a slide presentation that has two slides, “Hello” followed by “World.”
Here’s an example that takes more advantage of passing a single animated
pict to slide—
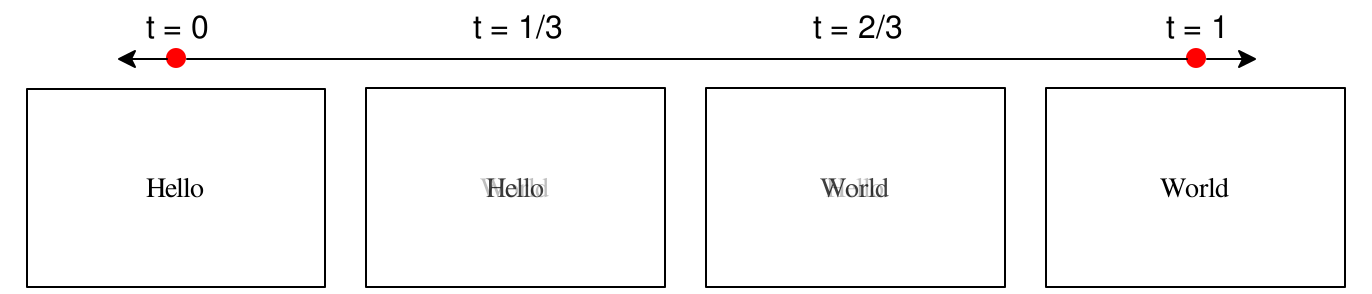
Even in that case, the same effect could be ahcieved with two slide calls, avoiding the need for Pict.sustain, but requiring repeition of the “World” pict:
fade_in(world)))
slide(world)
This last example works only because “World” is positioned the same on the screen whether or not it is centered with respect to “Hello.” It’s generally a good strategy to have transitions arrive at a same-sized pict, but when that’s inconvenient, a single animated pict is often better.
1.2 Staging with the slide Sublanguage
Suppose that instead of fading from “Hello” to “World”, we want to end up with both “Hello” and “World” on the ending slide but reveal them one at a time. We could implement that using sequential:
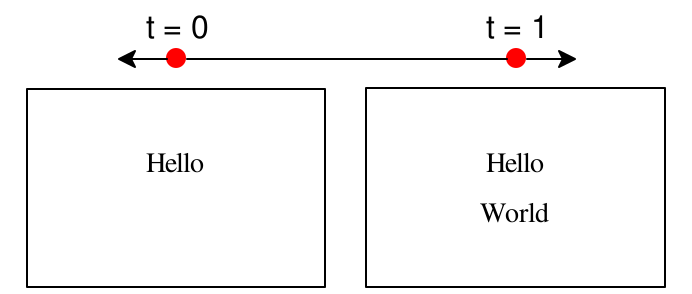
Two aspects of this example are especially common in slide presentations: vertical layout of multiple picts (especially text) with some space in between, and staged display of the stacked components. Because those patterns are so common, slide includes some shorthands to implement them. First, when slide receives multipl pict arguments, it combines them with stack and an amount of space that defaults to slide.gap, which is the constant 24.
Second, the special value slide.next is recognized as a separator in a sequence of picts. The separator causes a stack of picts after the slide.next to be shifted sequentially after a stack of picts before slide.next, achieving the same result as stack and sequential above:
@t{World})

The special value slide.sync is somewhat like slide.next, but instead of hiding the part after slide.next until all epochs have completed in the part before, a snapshot of the part after is used during the part before’s epochs.
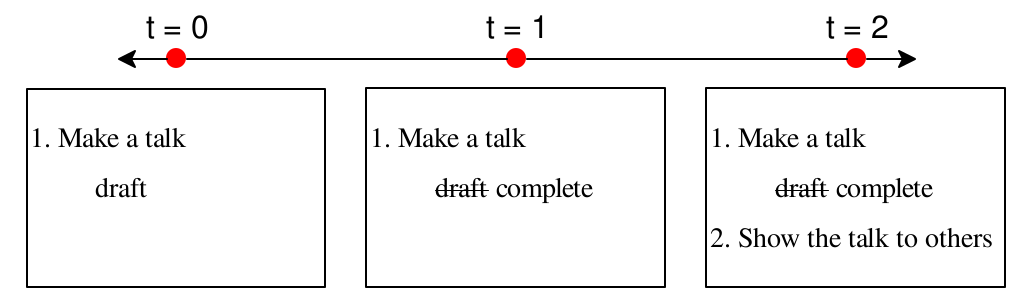
The slide.alts function is similar to switch. It takes any number of arguments and produces those arguments in sequence.
slide.alts(@para{draft},
@para{@strikethrough{draft} complete}),
@t{2. Show the talk to others})

The main difference between slide.alts and switch is that each argument to slide.alts is treated as content in the slide sublanguage, so it can include slide.next. Multiple content elements for a single alternative are grouped using a list. More generally, the slide sublanguage allows a list anywhere that it allows other content, and the list’s elements are spliced into the content sequence.
slide.alts([@para{draft},
@para{draft2, ...}],
[@strikethrough{drafts},
@para{... complete}]),
@t{2. Show the talk to others})
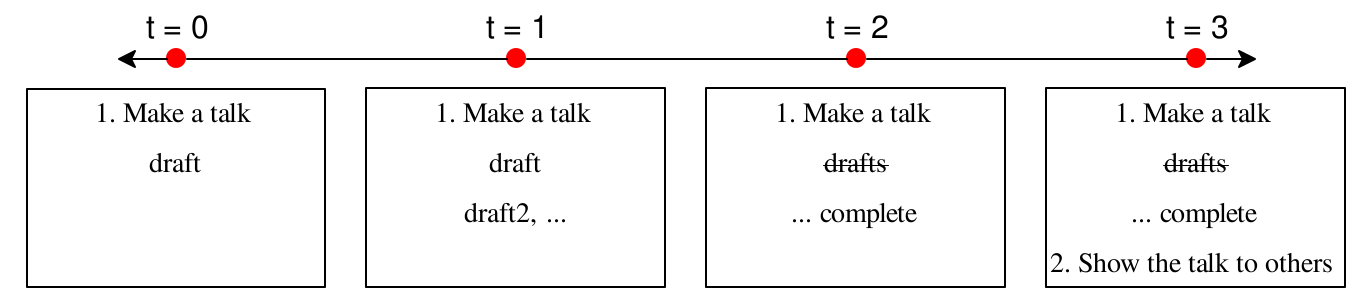
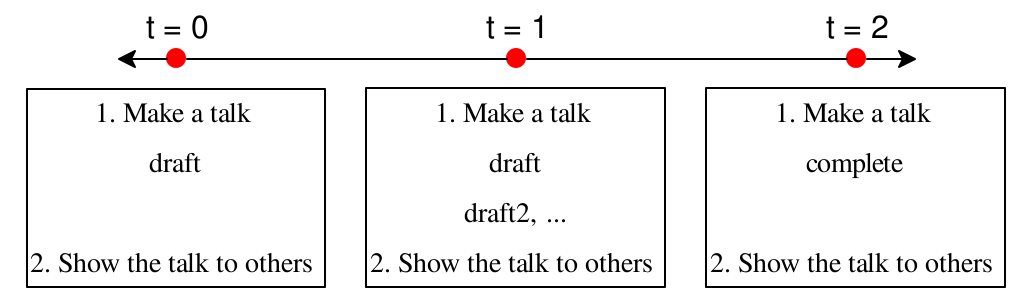
Another difference between slide.alts and switch is that slide.alts adjusts each of its alternatives so that they have the same height. That adjustment prevents slide content from jumping around on the screen when it appears after the altertaives, and it prevents the slide content as a whole from shifting due a height change (since content is centered on the screen by default).
slide.alts([@para{draft},
@para{draft2, ...}],
@para{complete}),
@t{2. Show the talk to others})
1.3 Alignment with the slide Sublanguage
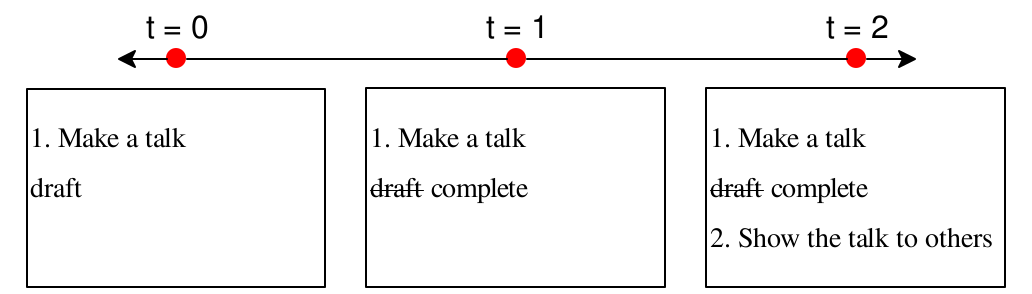
The staging example illustrates an alignment problem that is common when layout out slide content: the “1. Make...” and “2. Show...” text would look better left-aligned instead of centered. The slide.align function takes slide content to be spliced into an enclosing sequence, but it adjusts every pict to be stacked in the content so that it has the same width, left-aligning the widened picts by default (but a ~horiz argument can specify a differnt alignment).
@t{1. Make a talk},
slide.alts(@para{draft},
@para{@strikethrough{draft} complete}),
@t{2. Show the talk to others}
))
While using slide.align in our running example looks better, the “draft” to “complete” portion would look better centered. The slide.center function adjusts the effect of an enclosing slide.align to override alignment for the arguments of slide.center. The slide.center function is a shorthand for slide.horiz with ~horiz: #'center.
@t{1. Make a talk},
slide.alts(@para{draft},
@para{@strikethrough{draft} complete})
),
@t{2. Show the talk to others}
))

The running example almost looks right, but independently centering “draft” and its strikethough with “complete” makes the “draft” text shift leftward as the slides advance. To make those nested picts to be left-aligned with respect to each other, we can use a nested slide.align.
@t{1. Make a talk},
slide.alts(@para{draft},
@para{@strikethrough{draft} complete})
)
),
@t{2. Show the talk to others}
))
1.4 Slide Content as a Pict
The staging and alignment features of the slide sublanguage could be implemented directly with pict animation primitives, but the slide sublanguage can save some tedious orchestration of sequential and Pict.pad over lists of content picts. Meanwhile, when an animated pict is used as content for the slide sublanguage, that animation composes naturally with any animation steps that are created by the sublanguage.
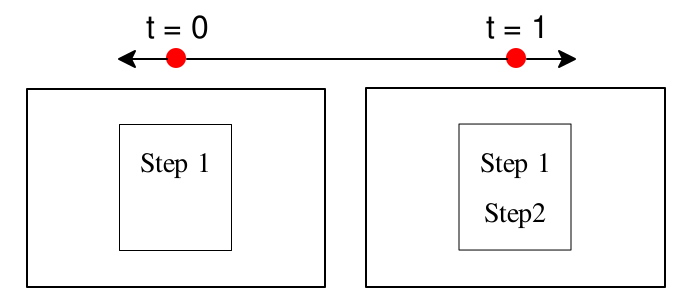
The revserse direcion is also possible. The slide_pict function takes slide content and produces the same (potentially) animated pict that slide would create for the same content. That pict can then be passed to other functions that work on animated picts instead of the slide sublanguage.
def steps = slide_pict(@para{Step 1},
@para{Step2})